In order to become a better Ethereum developer or smart contract hacker, one must first understand fungible tokens and the ERC-20 standard. So, here, in a concise and clear manner, we will talk about what fungible tokens are and the ERC standard, with practical examples.
fungible (or replaceable) token
To understand fungible tokens, let’s start with the definition: “fungible” means replaceable by an identical item; mutually interchangeable. A quick Google search will save you from 1 or 2 things.
So, fungible tokens are interchangeable and also divisible. This means they don’t have to be whole numbers; you can have, let’s say, 15.24 ETH. Also, they are not unique; I said they are unique in the sense that one unit of a token being identical to another means 1 ETH is the same as any other 1 ETH like $100 is the same as any other $100. The value might change, but the units themselves are identical.
Fungible tokens are also liquid, meaning they’re easily bought and sold on the market without affecting their price/value (this is what we mean by “market liquidity”). For example, you can easily swap BNB for other tokens and receive a fair value in return.
ERC20 Standard
ERC stands for Ethereum Request for Comments, and it was introduced and developed by OpenZeppelin.
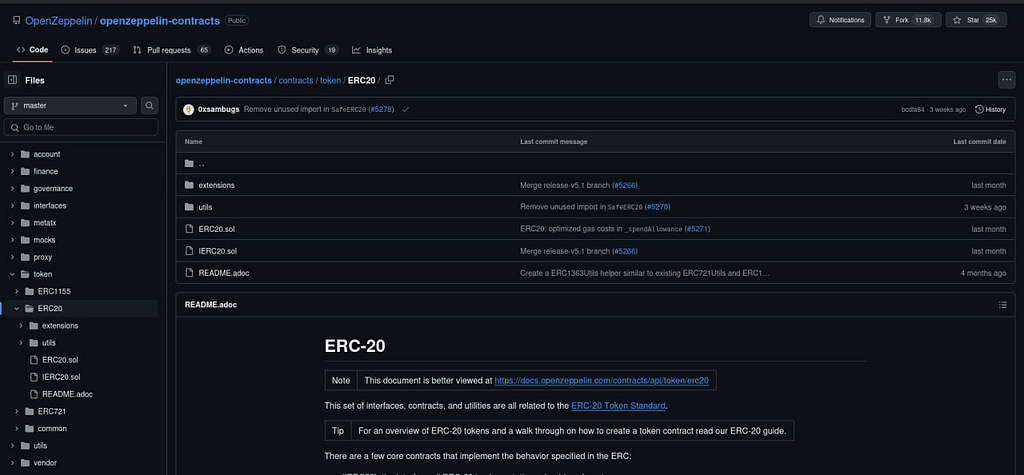
The most important thing to understand is that every token you create on the Ethereum blockchain is backed by a smart contract. This contract includes the ERC-20 standard, the token’s name, symbol, and all the other details about the token. If you ask me: Why is this standard so important? Well, think about it — if everyone is creating their own tokens and we use them randomly, it could be a mess. Don’t think this way? Well, if you don’t think I can’ help!! But I would say that’s where the ERC-20 standard comes in to protect us from scammers.
From a development perspective, it’s also very, very important to be honest. Imagine if some tokens implement certain functionalities that others don’t — how would they work together? We wouldn’t even be able to swap them without losing value. In fact, we could lose all of our money. We wouldn’t be able to trade or interchange tokens properly. To do all the things we mentioned above, we need a standard on which all tokens are built. This is where the ERC20.sol standard comes into play.
ERC20.sol
Let’s look at the actual ERC-20 standard from OpenZeppelin. Instead of building all the token functionality from scratch (like mapping balances and transfers), we can inherit from OpenZeppelin’s contract, correct? Easy.
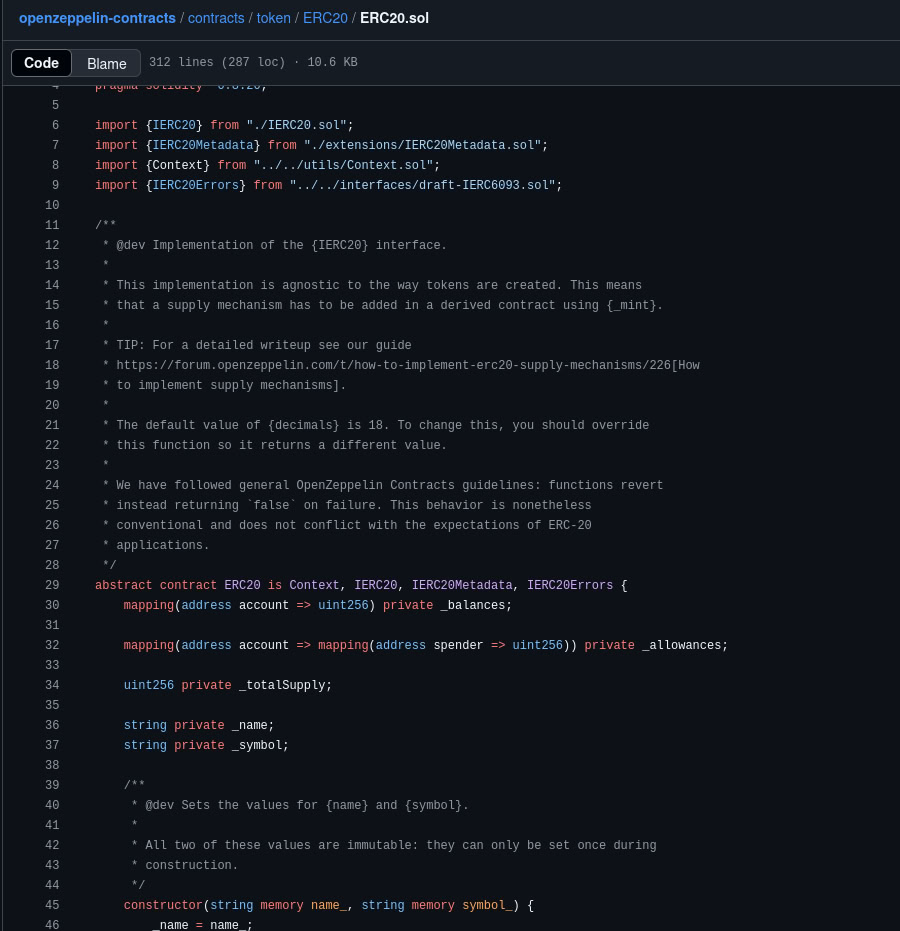
This inheritance gives us access to built-in functions and variables, like _balances (for account balances), _name (the token’s name), and _symbol (a short symbol like SHIB). These are core parts of the ERC-20 standard. You can see these in action if you look up a token like SHIB on Etherscan — you’ll see its symbol, contract address, and other info directly from the ERC-20 implementation.

As you can see, we have the SHIB symbol, the contract address, and many other details that come directly from the ERC-20 standard. Now, if you remember what we mentioned earlier — about divisibility and so on — you might be starting to get the point. But, if you’ve also read my other article on Solidity, you’ll know that on Ethereum and Solidity, we don’t have floating-point numbers. We only have uint and int. This means Ethereum doesn’t understand something like 12.10 USDC. Instead, it represents it as a much larger integer, which could be something like 12.10101010000…. with many more zeros. The default is usually 18 decimal places, I believe.
Let’s look at an example transaction on Etherscan…
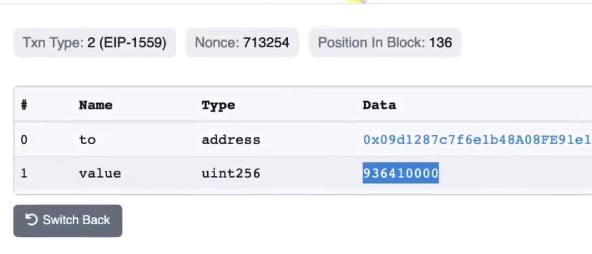
See? The type is uint, not float. Even though they transferred 926.41 USDC, if you take this number: 936410000, you would need to move the decimal point 6 places from back to front to convert it to the actual float value: 936.410000. That’s how we represent tokens.
Built-In functions
By inheriting ERC-20, your contract gains access to a suite of built-in functions. These functions handle core token operations like balance inquiries, transfers, and supply management.
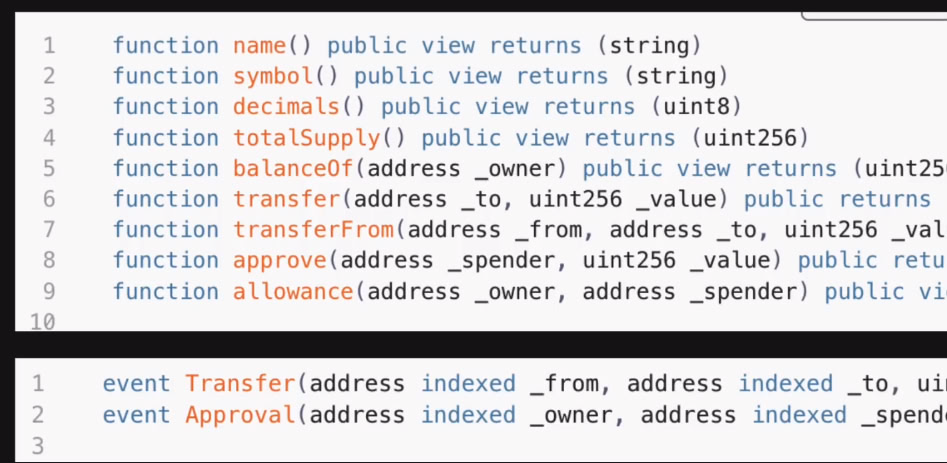
Also, by default, you have events like these (above image). But for now, since we can’t explore all of them in one article, maybe we can break it down into parts? I’ll try to cover these main functions in-depth:
- balanceOf()
- totalSupply()
- transfer()
- approve()
- transferFrom()
balanceOf()
Starting with the simplest one: this function simply gives you the balance of an account.
function balanceOf(address account) public view virtual ovveride returns (uint256) {
    return _balances[account];
}
So, when you call this function, you’ll retrieve the balance of the account. It’s quite simple — basically returns a map of values for the account.
totalSupply()
This one is also easy to understand. It tells you the total supply for a particular token. Let’s say the token is called “nazu.” Whenever someone mints a token or creates a new token, the total supply grows. It keeps increasing.
function totalSupply() public view virtual ovveride returns (uint256) {
    return _totalSupply;
}
When someone burns a token or sends it to a non-existent address (like the zero address), the supply decreases. So this function just gives you the value of the _totalSupply variable. Simple.
transfer()
This is where it gets more interesting. This actually changes the state — transfers tokens from account A to account B. The catch is, you have to be the owner of the token. If you don’t own the token, the function will revert and fail.
function transfer(address to, uint256 amount) public view virtual ovveride returns (bool) {
    address owner = _msgSender();
    _transfer(owner, to, amount);
    return true;
}
You specify the amount and the sender’s and receiver’s addresses. Now, let’s look at the internal _transfer function to see what happens behind the scenes.
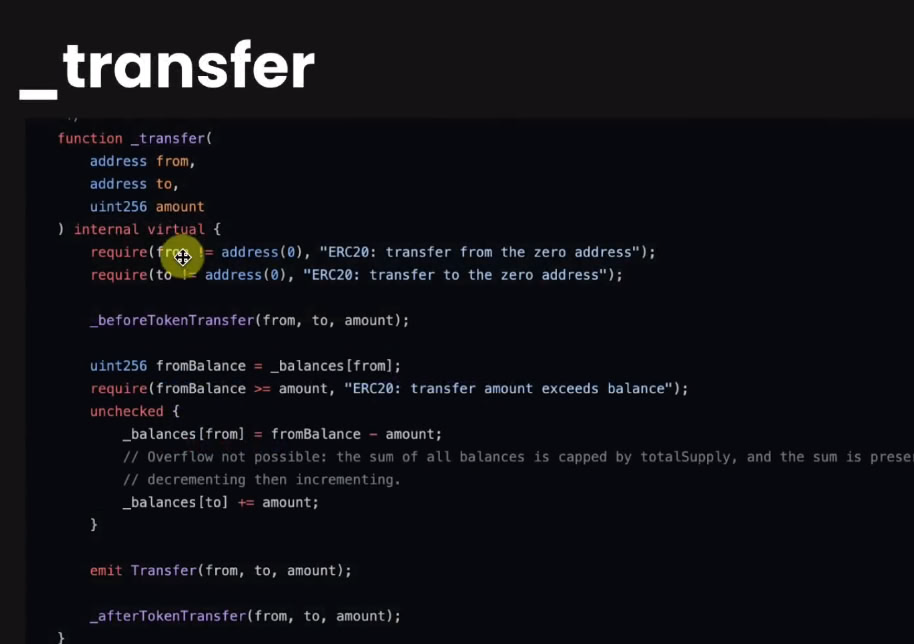
As you can see, it gets three parameters: from, to, and amount. The first thing it does is check if the addresses are valid and not the zero address (which is used to burn tokens). Then, it checks the balance using the _balances[] function and updates the balances accordingly.
So, when you transfer tokens, you’re the one doing it, right? But sometimes, you might need another account (or smart contract) to spend tokens on your behalf. This feature is really useful, and we’ll see why later. This is where the allowance mapping in Solidity comes into play.
_allowance and approve()
We use this mapping to allow another account to spend tokens for us. Why would we do this? We’ll get into it more in the next part of the article (or maybe in a future one). But for now, let’s just understand the allowance mapping.
mapping(address => mapping(address => uint256)) private __allowance;
This is called a nested mapping. Think about it: the first address is the token owner, and every owner can link a spender to an allowance, meaning they’re giving permission for another address (the spender) to spend a certain amount of tokens on their behalf. The second address is the spender, and the uint256 is the amount of tokens they’re allowed to spend.
function approve(address spender, uint256 amount) public virtual ovveride returns (bool) {
    address owner = msgSender();
    _approve(owner, spender, amount);
    return true;
}
When you call the approve() function, you’re changing the allowance mapping. It calls the internal _approve() function.
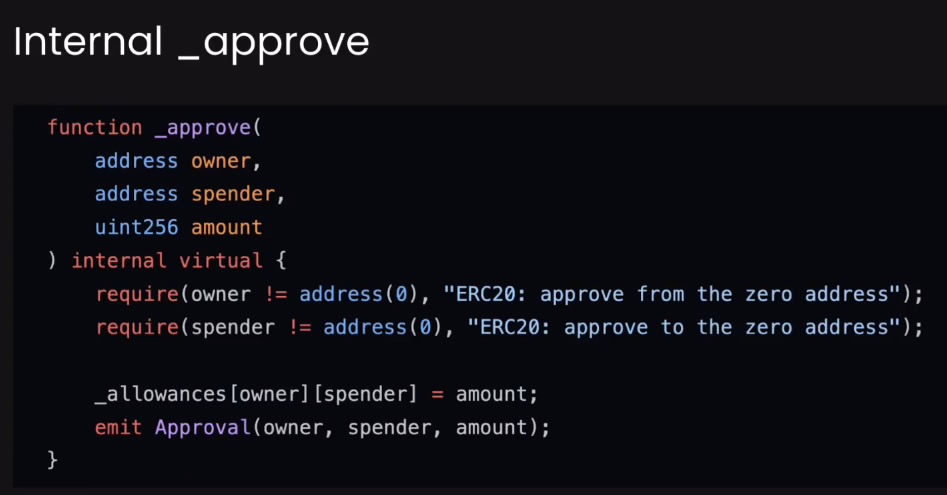
This logic is private and implemented by OpenZeppelin in their ERC-20 token contracts. As you can see, there are three parameters: the owner, the spender, and the amount. It checks if the owner and spender are valid addresses (and not the zero address) and then updates the _allowances mapping. Easy.
transferFrom()
Now we have transferFrom(). This function is similar to transfer(), but the key difference is that it also accepts a from address.
function transferFrom(
    address from,
    address to,
    uint256 amount
) public virtual override returns (bool) {
    address spender = _msgSender();
    _spendAllowance(from, spender, amount);
    _transfer(from, to, amount);
    return true;
}
So these are the main functions to master if you want to build or pentest smart contracts. Overall, this is how an ERC-20 token works. In the next article, I’ll show you functions like mint(), burn(), and others that are really important but don’t come with the ERC-20 standard. We’ll talk about them in more detail soon.
Thanks for reading!
Ethereum: Introduction to ERC20 Token was originally published in The Capital on Medium, where people are continuing the conversation by highlighting and responding to this story.
